

Stage 1: Model preparation
Stage 2: Mounting models for painting
Stage 3: Base-coating
Stage 4: Camouflage
Stage 5: Bringing out the detail
Stage 6: Markings
Stage 7: Protecting the paintwork
Stage 8: Basing
I'm very far from being the world's greatest painter of microarmour, but I flatter myself that I can usually pull off an acceptable result. These pages are intended to show the process I use — the system may not be suitable for all cases, but hopefully you may find it useful.
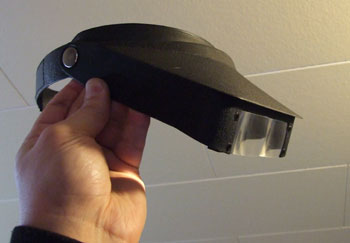
You can't paint what you can't see. Possibly the most useful piece of equipment I've bought recently is this headset magnifier. It's not the most expensive version you can get by any means; this one just has plastic lenses, but it has a second set that flip down behind the main lenses for really high magnification. My eyesight isn't what it once was, and this magnifier is a huge help.
Magnification is helpful, but more important is good lighting. I use a pair of lamps, one on either side of my workspace, to get good, even, bright illumination.
I have two mini-drills; one old hand-held drill that I seldom use any more except for filing brass pins for use as barrel replacements and another better multi-speed drill with a flexi-shaft for more comfortable handling.
Tweezers are essential for handling tiny parts; many of the models require some assembly, and though human fingers are very sensitive instruments, they're also distressingly sausage-shaped.
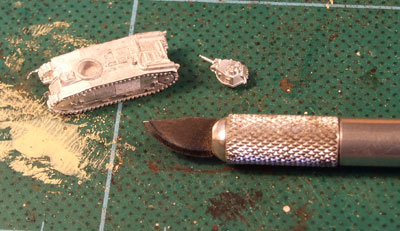
I use a variety of scalpels and craft knives, but the type I prefer are the round-barreled metal ones with a chuck for the blade, like this one here. A range of fine jewellers' files is also often useful.
Buy the best quality brushes you can afford. They will require replacement less often, and if looked after will give good service for years. Kolinsky sable is supposed to be the best, but synthetic fibre brushes are much improved over the last decade or so and can be excellent.
I have a Badger 150 double-action airbrush that I use for all base-coating. You can get good results by brushing, but nothing can match the even, fine surface laid down by a decent airbrush.
I primarily use Tamiya paints for spraying, and Vallejo for brushing. I also use artists acylics by various manufacturers, mainly the range of acrylic gouaches from Maimeri. For sealing and protecting the paintwork from the handling that wargames models get, I use a gloss acrylic first (because it's tough and it doesn't yellow), followed by Humbrol matte enamel.
