

Stage 1: Model preparation
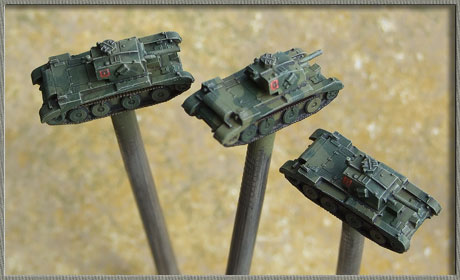
Stage 2: Mounting models for painting
Stage 3: Base-coating
Stage 4: Camouflage
Stage 5: Bringing out the detail
Stage 6: Markings
Stage 7: Protecting the paintwork
Stage 8: Basing
Once you've gone to all the trouble of painting up your little masterpieces, you're going to have to take some thought for protecting all that hard work. Wargames figures tend to take a bit of a pounding, and left unsealed the paint will soon start getting worn off vulnerable areas. Also, a couple of coats of varnish helps to unify the paint-job by creating uniform surface texture and reflectance.
I seal and protect the paintwork in two stages:

First, a coat of gloss acylic varnish. I just use a household acrylic polyurethane for this; I have a 500ml can of the stuff that I decant into a squeeze bottle as and when I need to. I expect that much to last me a good long time.
The reason for using a gloss is that it is much more hard-wearing than matte varnishes. The reason for using acrylic is that the film of varnish is much more flexible than enamel, and therefore much less prone to chipping. Also, acrylic polyurethane is completely colourless and does not yellow over time, whereas most spirit-based varnishes have a very slight amber tint.
I don't thin the varnish at all, but I do brush it out well so that it doesn't pool in any recesses. This gloss coat will tend to make all of the colours seem brighter.
I have, in the past, used micros in this shiny, glossy state to wargame with. It does have an appeal, but it makes the models very toy-like, and these days I invariably finish with a matte varnish to finish it off.
NOTE: I forgot to mention this earlier, but you'll notice that I've painted in the empty space below the lower edge of the A-13's hull in black. The limtations of casting makes it very difficult to create pierced areas like this, so I've faked it with paint. It's not worth doing for all tanks — I didn't bother with the Valentines in the same picture, for example, because their road wheels are closely enough spaced that the lower edge of the hull isn't really visible anyway.
Second, a coat of matte enamel varnish. My favourite brand is Humbrol which creates a reliable completely flat finish. I've been hearing rumours about Humbrol going out of business, but I don't know if anybody else is going to buy up their name and range — if not I suppose I'll eventually have to find something else.
The reason for using an enamel matte varnish is because I've never found an acrylic matte that goes completely flat; they always seem to have a slight satin sheen. That's OK if that's what you want, and it can look pretty good, but I prefer a completely matte finish.
It's crucial that the varnish is thin and very well mixed before you brush it on. When I get a new can, I always add a little thinner and drop a couple of stainless steel nuts into it to act as agitators, and then shake the bejeezus out of it for a couple of minutes before I apply it. It doesn't have to be thick because it's not providing the primary layer of protection — that's the job of the acrylic.
Leave the models to dry completely before handling them, overnight at least. The varnish is relatively fragile until it's properly cured, and if you start pawing at your models prematurely you're likely to start to rub it off.