
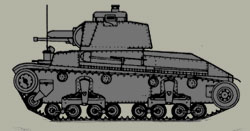
Stage 1: Model preparation
Stage 2: Mounting models for painting
Stage 3: Base-coating
Stage 4: Camouflage
Stage 5: Bringing out the detail
Stage 6: Markings
Stage 7: Protecting the paintwork
Stage 8: Basing
There are a couple of companies that produce decals for AFVs in this scale, but there's no local supplier for them here in Christchurch, and I'm still pretty much a newbie when it comes to shopping over the internet.
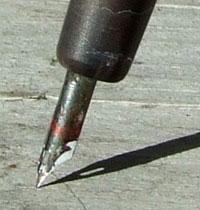
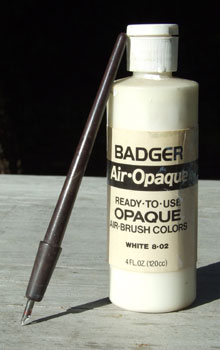
I draw the markings on microarmour with a fine steel-nibbed mapping pen and Badger Air-Opaque white acrylic, which is formulated for airbrushing and is thin enough to run easily out of the pen but opaque enough to make a definite mark. I have used 0.18mm and 0.13mm technical pens (Rotring or Staedtler, for example) and they do a fantastic job, but they're very expensive and the white ink for them tends to clog them more easily than the black. Fairly new on the market are gel pens which do lay down a good white line, but they tend to create too thick a line for microarmour markings.
Just how far you want to go with AFV markings is up to you, but in this scale I find that less is generally more. I normally stick to national markings (e.g. German crosses) and any marks that would be visible on a real vehicle from a couple of hundred metres. If you try to include everything, like divisional marks and serial numbers, they will tend to stand out too much and overwhelm the base paintwork.
If I'm painting coloured markings against darker background colours, I'll usually draw them first in white with the nib and then go over them again paint. I've found that if acrylic is thinned sufficiently to form a fine enough line for most markings, it becomes too transparent to stand out against a dark base colour.
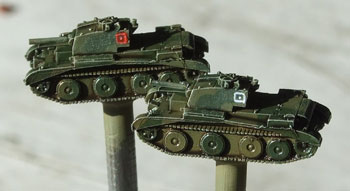
In the image to the right, I've over-painted the troop designation on the back A-13's turret with red. If I'd drawn it straight on in red, the line would have looked more like a dark brown.
You can get quite fine and precise with a steel nib, to the point of getting recognizable text. On the T-34/76s shown below, I've drawn on some of the patriotic slogans the Soviets were so prone to painting on their vehicles. I've also included red stars on the turrets, which I've since found out were rare until the invasion of Germany in the final months of the war, but they can stay there now.
The markings may look a little crude in these pictures, but bear in mind that the models themselves are only about 20mm long.

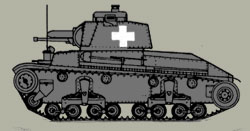
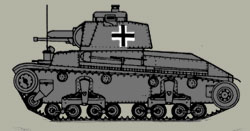
Painting the Balkankreuze (the German Cross)
|
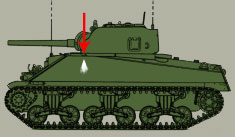
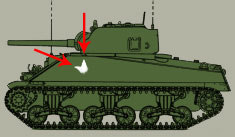
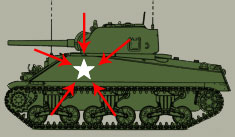
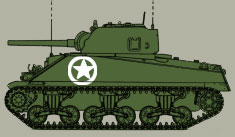
Painting Stars
| ||||||||||||||||||||

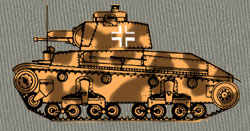
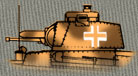 Painting a hollow cross against a camouflaged background is a little trickier, since you may have to paint the inner cross in two colours. Alternately, you could just paint the interior of the cross in the base colour as shown here to the right, which often looks just fine in this scale.