

Stage 1: Model preparation
Stage 2: Mounting models for painting
Stage 3: Base-coating
Stage 4: Camouflage
Stage 5: Bringing out the detail
Stage 6: Markings
Stage 7: Protecting the paintwork
Stage 8: Basing
Before I start painting, I glue the turrets to the hulls of the models (unless I'm going to be airbrushing the camo — I'll deal with that later). It's not completely necessary, and some people may prefer to leave them free to rotate, but I find that if they're not glued they inevitably end up getting lost. If I'm using them for a wargame in which turret facing and rotation speed is actually an issue, the current turret facing can easily be indicated with a painted toothpick or similar.
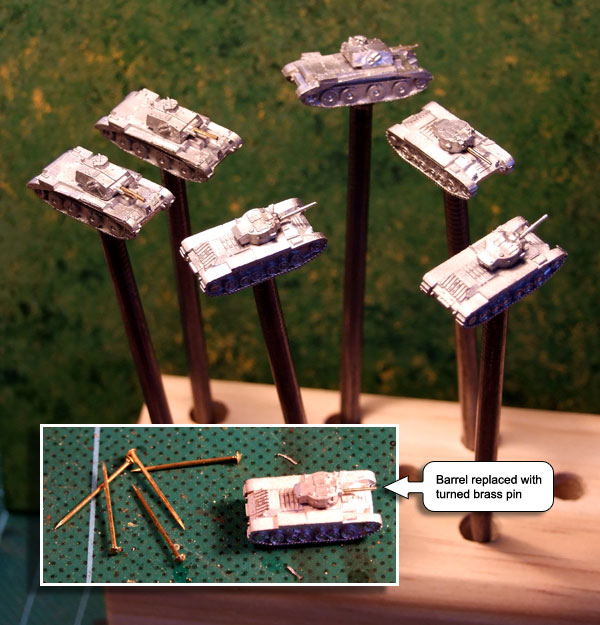
Also, I like to replace the barrel with a brass replacement made from a pin, as shown in the inset in the image to the right. It's not always neccessary, but especially if the cast barrel is long and/or finely cast, something a bit stiffer than white metal is preferable for models that have to take as much handling as wargames minatures do. I use brass in preference to steel pins for two reasons: first, because it won't rust away underneath the paint, and second because it's easier to shape than steel. However, for very fine barrels (like a 20mm Flakvierling, for example) 0.20mm steel guitar strings work very well, being both very fine and quite stiff.
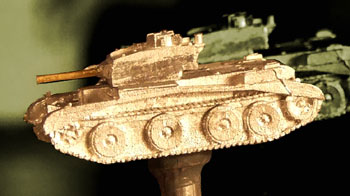
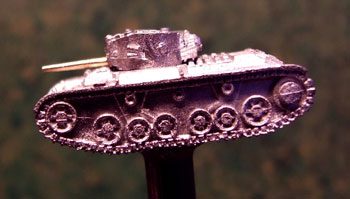
Both tanks in the images below are supposed to be armed with a 2pdr gun, which has a very slender barrel. For the top one (an A-13 Mk.I) I just clipped off a length of brass pin and filed the end flat. It actually doesn't look too bad in real life, but in close-up the gun looks more like a howitzer than a delicate 2pdr. For the bottom tank (a Valentine Mk.II) I mounted the length of pin in a mini-drill and turned it down to a cone with a small file; it looks much better than the A-13, though in close-up it's still much heavier than a 2pdr would really be in scale. The whole process only takes a few minutes, and is well worth the trouble.
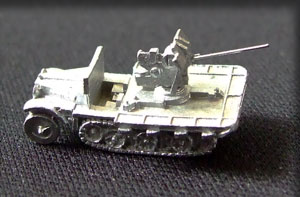
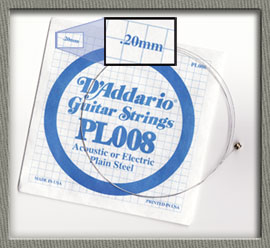
The 20mm AA halftrack shown to the right has had its barrel replaced with the 0.2mm guitar string I mentioned earlier (the string shown cost a whole $3 and will provide hundreds of barrels). It's not easy to find wire finer than this, and in any case I doubt that there would be much point — apart from anything else, it's bloody difficult finding drill bits fine enough for this sort of thing.
These models are small and fiddly, and before painting begins they need to be mounted on a support of some kind so that you don't have to touch them at all. I've tried various methods, but the one I like best is to stick them to the heads of 4" jolt-head nails with a blob of super-glue. This holds them firmly enough for painting, and the nail provides a hand-grip that is large enough to hold comfortably, but not so large that it becomes obtrusive. Each model on its stand is kept in a hole drilled in a wooden block, as you can see in the large image above. Once painting is finished, the models can be easily snapped off the nail.