<< Back to Fitz's Roleplaying Stuff < Fitz's Swords & Wizardry Stuff
It's incredibly easy.
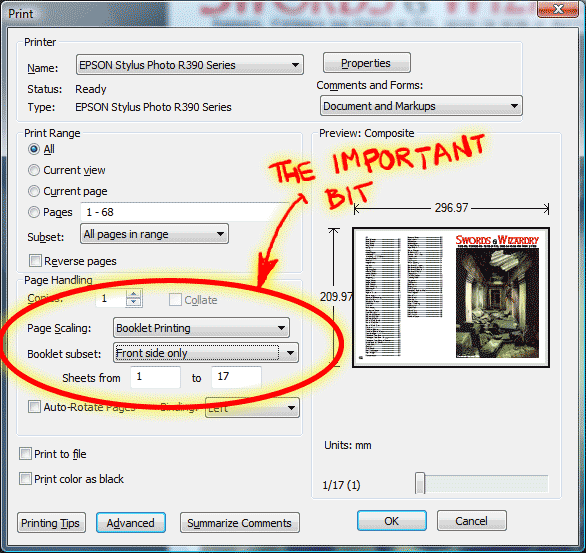
To the right is a screenshot of Adobe Acrobat's print dialogue (this is for Windows, but I assume the dialogue for OSX is similar). The important bit for our purposes are the drop-down menus for Page Scaling and Booklet Subset.
My own printer doesn't do automatic duplexing (double-sided printing), so I have to turn the pages manually. For that reason, I have to print twice — first with "Front side only" selected, then I turn the sheets over and print again, this time selecting "Back side only".
If you're lucky enough to have a printer that does this automatically, you can probably just select "Both sides" and let it take care of everything for you.
I like card covers on my booklets, so I make sure the first sheet in my printer's paper tray is always a piece of light card.
Note: Publications formatted for larger page sizes (A4 or Letter) can easily be reduced to an A5/digest format this way, but bear in mind that the text will shrink. If the original is laid out in 12pt type, the final text size will be about 8.5pt, and 10pt text will shrink to about 7pt.
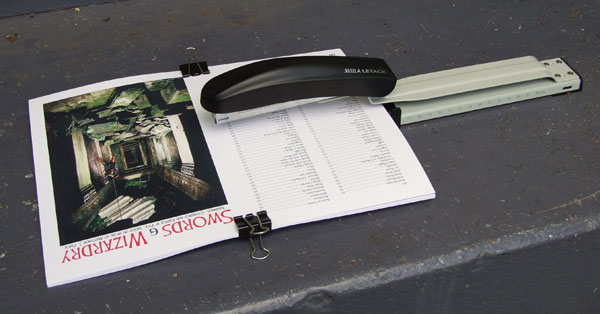
Once you have your pages printed, they need to be assembled into a booklet. The easiest way to do this is with a long-arm stapler, but be aware — the largest number of pages suitable for hand-stapling is about 64-72pp. More pages than this (or if you don't have access to a long-arm stapler) and you're better off sewing it together (I use un-coloured dental floss for this, it's pre-waxed and very strong).
This stapler cost me about $NZ30 from a local stationery supply store. I clamp the pages with a pair of spring-clips to keep everything stable while stapling.
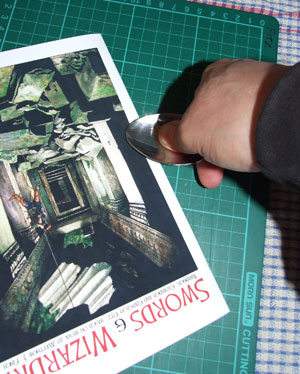
Once stapled together, the booklet is folded along its spine, and then I use the back of a highly-polished spoon to create a hard fold. You need to get your weight behind this folding step, but it's not difficult.
When folded, the thickness of each page will cause the outer edge of the booklet to have a wedge-shaped profile. Cut this flat with a steel straightedge and a good sharp heavy craft knife. You may also want to trim the top and bottom edges, if they're a bit rough. Getting a clean cut can take a bit of practice if you're dealing with a thickish booklet, but again it's not that difficult to do with care.
Trimming in this way will result in the centre pages having a narrower outside margin than earlier pages. If you're laying out a publication intended for saddle-stitching (which is what we're doing here), you will need to take this into account and not make your outside margins too tight. Trimming the edges flat isn't compulsory by any means, but I think it makes the finished booklet look a lot tidier.
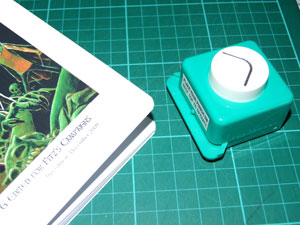
I'm also a fan of rounded corners on my booklets, and I take care of that with a cheap $10 radius cutting punch that I got from a scrap-booking shop. This little punch will only handle about ten or twelve pages at a time, but the heavy-duty lever-punches are well out of my price range.
And that's it. Your booklet is done.