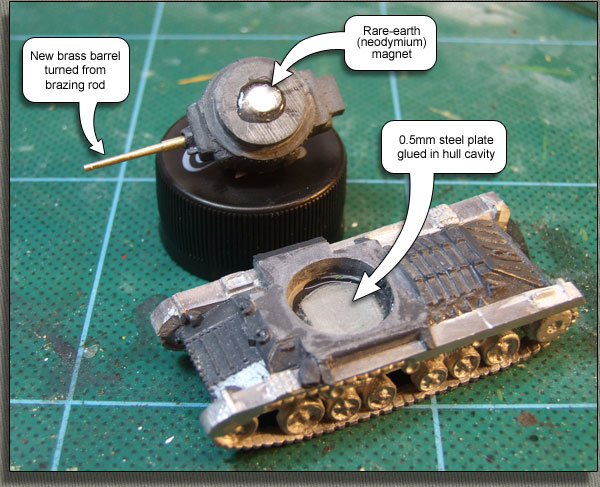
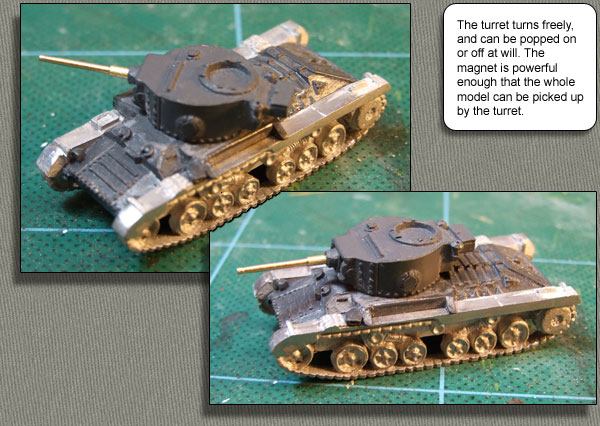
Because this model is eventually intended for wargaming, and I want the turret to be rotatable and to be able to pop it in and out at will without having it fall out at inopportune moments, I set a small neodymium magnet in the turret and mated it with a thin steel plate glued into the hull cavity. These little magnets are fantastic for the purpose, being strong enough that the whole model can be lifted by the turret if need be, but small enough to fit in quite tight spaces.
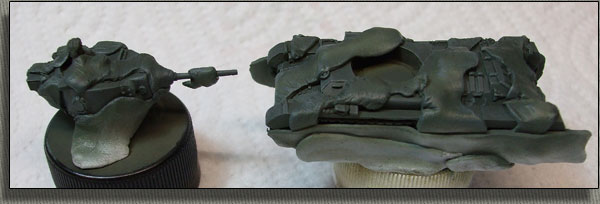
I discarded the soft white-metal 2pdr supplied with the kit, and scratch-built a much tougher gun of brass (or maybe bronze, I'm not 100% sure) hard brazing rod. These come in soft and hard varieties — the soft brazing wire is quite malleable and bends relatively easily, while the harder rods are relatively brittle. Either is better than white metal, but the hard rods are easier to turn accurately.
I took measurements from the original piece, marked out the barrel sections on the rod section and and mounted it in an electric drill. I used my Ryobi battery drill, because I didn't want it spinning too fast; the lowest speed on my corded drill would be too fast.
I used standard needle files to turn down the rod to the dimensions I wanted. The barrel is still too thick for a 2pdr in this scale, but any thinner than this and it would become too fragile, and take away the whole point of replacing the original barrel in the first place.
Once construction is complete, the whole thing is washed with warm water and dish-washing detergent to remove any traces of casting lubricant or skin oils, and then dried thoroughly before painting begins.
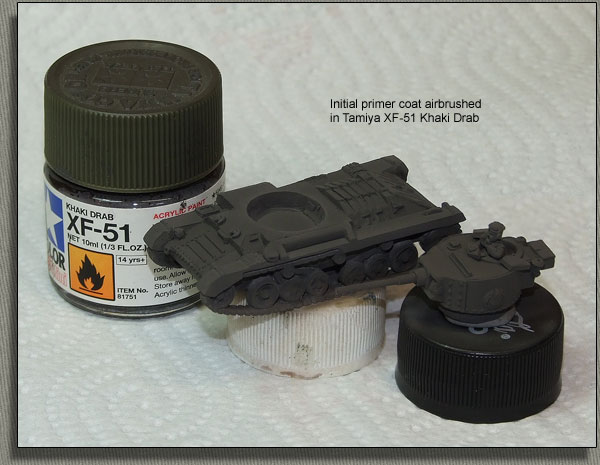
I prefer to airbrush with Tamiya paints wherever possible, because being alcohol-based the solvent evaporates rapidly, reducing the chance of spattering or blobbing and cutting down on time between coats. Also, I find I can get a much finer line with my old Badger 150 airbrush with Tamiya paints than with any of the others I've tried. Tamiya paints airbrush very well, but they're not nearly as good for traditional brushing or dry-brushing as Vallejo acrylics — the first coat brushes on easily enough, but for some reason successive coats don't usually lay down smoothly unless the paint is very well thinned.
Vallejo Model-Color acrylics do airbrush well enough (though they require a lot of thinning), but when airbrushed on to un-primed metal or resin surfaces they're very fragile until they've been properly sealed. Tamiya paints go on a lot tougher, and are better suited therefore to acting as the primer coat.
I want the primer to create shadows for the base colour, so I've used a colour that is dark enough to do that, but not so dark as to stand out too much against the overlying shades. Black would be much too stark a contrast.

Vallejo Russian Uniform is a reasonable match for the early-war British Middle Bronze Green, but it's not exact, being somewhat too light. However, in small scales like this, you need to lighten the shades of the colours you use, as an exact match will almost always look far too dark.
Getting a scale colour match is far more an art than a science, but fortunately for us, real-life vehicles often varied wildly from any official standard due to all sorts of factors — fading and weathering being the predominant causes, but the application method will have an effect, as will variations in batches of paint. The long and short of it is that as long as you're in the right ball-park, you won't really go too far wrong.
Once it has a primer coat to adhere to, airbrushed Vallejo colours are quite tough enough to withstand a reasonable amount of handling. Nevertheless, you want to handle the paint as little as possible, as fingers leave behind a surprising amount of acidic oil which can hinder later painting, and may (over time) degrade the integrity of the cured paint surface. For this reason, I attach the pieces to bottle-tops using blu-tak, and only hold the pieces by those impromptu handles.
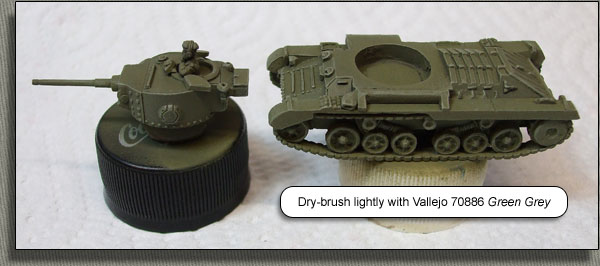
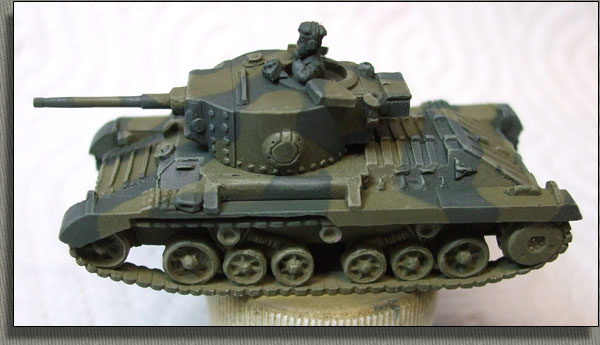
The next step is to bring out the highlights by dry-brushing. In this case, I've used Vallejo Green Grey.
You don't want to go berserk with the dry-brushing; if you do it too heavily you will lighten the base colour excessively. All we want here is for the outlines of the vehicle to be enhanced, not to recolour the whole thing.
Vallejo paints are fantastic for dry-brushing due to their viscosity and opacity. Get a decent brush-load of paint, but then wipe it almost all out, first against the palette and then on a tissue until almost no more colour is coming out. Then run the brush gently across the raised detail that you want to enhance — the Valentine really benefits from this due to its ribbed hull and rivets. You don't need to scrub the paint on, and don't worry about getting it all on at once, several light coats will give you a much smoother effect. At this stage, try to avoid lightening any broad, flat areas — that may come later, depending on how you want to weather the tank.
Once this step is complete, the model will appear quite a bit lighter, even though you've avoided overpainting the base colour to any great extent. That's because we've created artificial highlights that makes the colour appear more reflective than it really is. It will be darkened again at a later stage with washes to enhance shadow details.
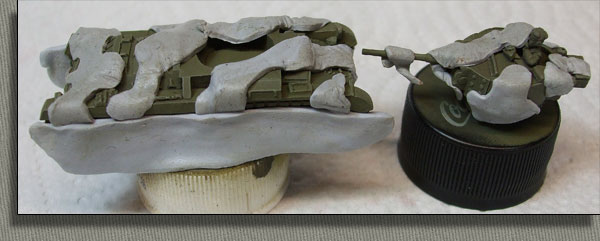
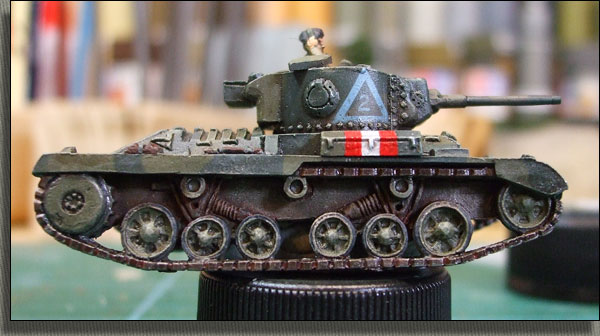
This Valentine carries a disruptive pattern of irregular stripes and blotches, painted with hard edges. The pattern could easily be painted in with a brush, but I prefer the very smooth and even surface given by the airbrush.
To ensure that paint only goes where I want it to, and to give the pattern the hard edges it needs, I have to mask out everywhere the secondary colour doesn't go. On smooth, flat surfaces it's easy enough to do this with masking tape, but the irregular surfaces of this model demands a different technique.
I stretch and roll out blu-tak (a sticky putty used for mounting posters on walls and so forth) into a thin, reasonably even sheet. I rolled it out straight on to my cutting board so that I could cut through it, making the shapes of the masks I need. Then I just pressed it into place on the model, making sure that it was firmly in contact with the surface right around its edges.
Once the blu-tak mask is in place, it's a simple matter to spray on the secondary disruptive colour. In this instance I'm using Vallejo Bronze Green.
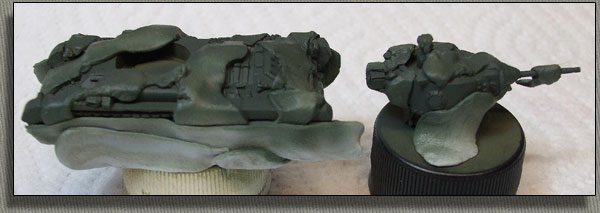
To match the dry-brushed highlighting on the base colour, I repeat the process using a lightened tint of Bronze Green with the mask still in place. You can dry-brush after removing the mask, but leaving it in place makes the job a lot easier — you don't have to be careful not to colour outside the lines.
Unfortunately it's not really very easy to see the dry-brushing process in this photograph, but's definitely there...
When the second lot of dry-brushing is complete, you remove the blu-tak mask and hey-presto, there's your camouflage pattern, with matching highlights in an appropriate colour.
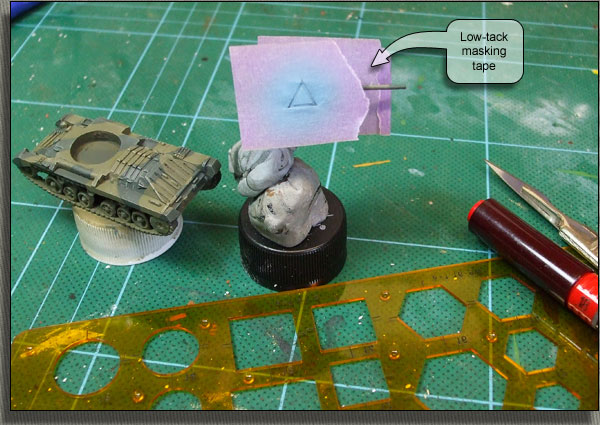
The major markings are the large recognition triangles on the turret sides. To get geometrically accurate equilateral triangles, I used a shape stencil to draw the triangles on to low-tack masking tape and cut them out with a scalpel. Then the triangles were airbrushed in a pale grey-blue — again, this colour is lighter than that used for full-sized markings and has been tinted for scale effect. In this case I think I tinted it too far, but never mind that now.
Once the paint is dry (no time at all with acrylics) the masking tape is removed and beautiful even triangles revealed.
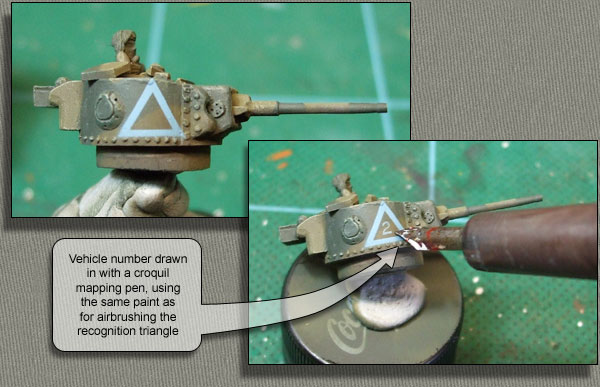
A vehicle number has to be inserted in the centre of the triangle; I did this with a fine-nibbed croquil mapping pen, using exactly the same paint as I used to airbrush the triangles.
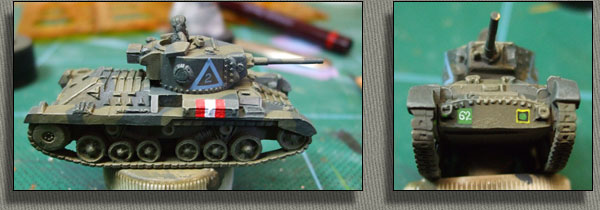
The remaining markings were painted and drawn on freehand — again, the number "62" on the unit sign was drawn with the mapping pen.
After the markings are complete, the next step is the ink-wash. This is designed to perform a similar function to dry-brushing, but enhancing shadow detail rather than highlights by darkening crevices, around rivets, panel lines and so forth.
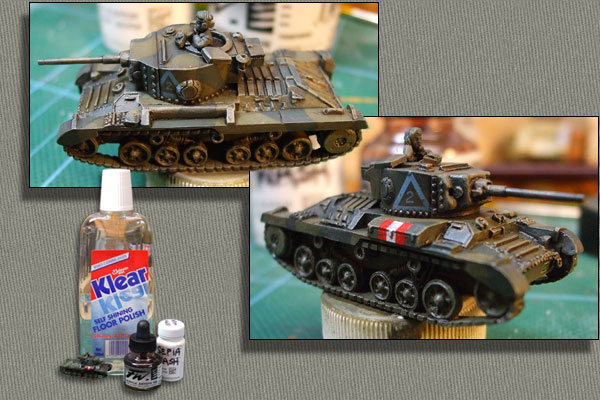
I use a mix of Johnson's Klear acrylic floor polish (sold as Future Floor Wax in the USA), water and translucent sepia acrylic ink: about 40% floor polish and 60% water, and just enough ink added to give a perceptible colour. The water here in Christchurch is exceptionally pure, but if your tap-water is very mineralized or chlorinated you may want to use distilled water instead.
The reason for using the acrylic floor polish is two-fold: first, and most importantly, it acts as a flow enhancer, breaking the surface tension of the water so that it runs across the surface and into crevices rather than beading up, and second as an intermediate sealer.
I use sepia rather than black ink because the colour is softer and creates a less stark contrast; using a black wash can easily create a rather cartoonish, artificial effect.
I first give the entire model an overall wash with a large, soft brush; this seals and unifies the underlying paint and creates the initial shadowing effects. Once dry, I then use a smaller #1 brush to create localized "pin" washes where I want the shadowing to be more intense. Areas that need to be heavily darkened can be painted with straight ink, but that is seldom necessary, and progressive washes are easier to control — it's far easier to build up colour than to remove it if you go too far.
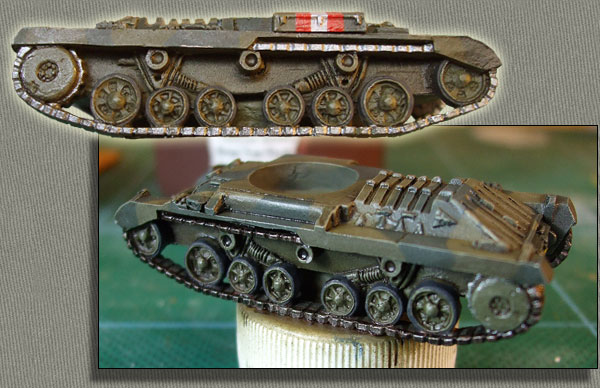
I start by painting the tracks a clean metallic colour — in this case, Vallejo Oiled Steel which isn't too dark, nor too silvery. The tyres on the road wheels are painted in a dark grey; I find pure black too contrasty for rubber. Vallejo German Grey works well enough.
When that is dry, I overpaint the tracks with undiluted sepia acrylic ink, leaving a "wear" band on the inside where the wheels would run. I paint in the track link separation lines, also in the ink.
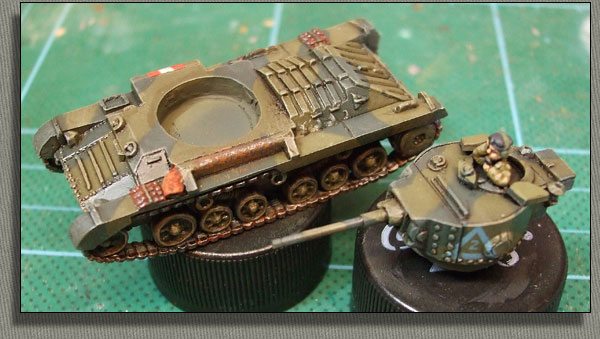
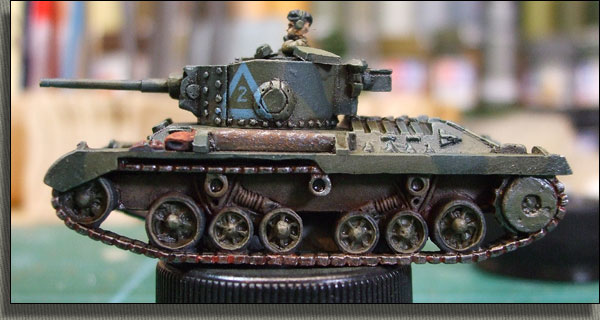
All the little bits and pieces are finished off now — the commander, spare track links, the exhaust, and so forth.
I also dirty-up the running gear a bit by scrubbing in some dirty brown in there, and washing the tracks with burnt sienna to represent relatively fresh rust. Because I'm representing a fairly clean vehicle, I don't go overboard with this, but just add enough so that it doesn't look absolutely factory-fresh. I finished off the tracks with a very light dry-brush of Oiled Steel.
Now it's basically done, and all that really remains is the final sealing. I do this in two stages; first with a hard-wearing gloss acrylic varnish, and finishing off with trusty old Humbrol 49 matte enamel (use the one in the tin — the stuff in the bottle stays slightly satin).